Posts

ChatGPT in PowerApps

Image
 Since ChatGPT is introduced it has made everyone curious. This AI powered chatbot built by OpenAI is just amazing!!!  One of the key benefits of using ChatGPT in PowerApps is its ability to understand and respond to natural language input. This can greatly enhance the user experience by allowing more intuitive interactions with the app. To know more about anything we ask "What is that" so i just asked that from ChatGPT itself....here's a brief of what I got.  " I am an AI assistant, trained to answer questions and assist with tasks. I am a computer program designed to process and understand natural language input, and generate responses. I use machine learning algorithms, which allows me to improve my performance over time with more data and feedback. My capabilities include language processing, information retrieval, and knowledge management. My purpose is to provide helpful and accurate information to users and assist them with tasks, and you can ask me questio

Multiple Developers in Single PowerApps

Image
We all know it's a mess when you have multiple developers and we want them to work on same App to save business hours and increase productivity. When someone is editing a PowerApps and you want other developer to work simultaneously we know it's not possible by default.

Custom Login Page

Image
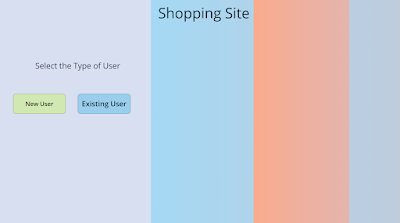
We all can agree having a Custom Login Page can really create an amazing UI experience. But the major drawbacks these custom login pages can cause is security. Not having a strong password and no email validation can really end up with junks records and breaches. I created a solution just for that. Custom login page that can perform strong password checks and email validation to filter junks. Home Screen  1. First add some HTML controls (here I'm using 2) to get the shady effect.  First HTML control-  "<div style =' height:767px; width:868px; background:linear-gradient(90deg, rgba(110,210,249,0.4842670344504989) 0%, rgba(101,126,144,0.20415498963257173) 100%); '></div> Second HTML control- "<div style =' height:767px; width:868px; background:linear-gradient(90deg, rgba(250,171,141,1) 0%, rgba(209,159,239,0.20415498963257173) 100%); box-shadow: -44px 2px 8px 0px rgb(108,240,111); '></div>" 2. Add 2 button one that direct you to

CHATBOT with PowerApps

Image
Let's have fun with Bots: We all know Power Virtual Agents can be used to make Chatbots within minutes, but you need to buy a whole different licensing and functionality is a bit limited. So what can we do?  Well we can either spend money like crazy or can be a bit creative and do wonders with PowerApps. So let's start and explore PowerApps. Create a Canvas App - 1. First we should create a canvas app and add 2 HTML Controls (one for title and other for box on which you can see the Data Table). I just added Label on top of title for text and Data table on box. Html Control for Title- "<div style='height:99px;width:1366px;background:linear-gradient(to right, #1f4037, #99f2c8);border-radius: 26px;box-shadow: 35px 35px 68px 0px rgba(24, 132, 10, 0.5), inset -8px -8px 16px 0px rgba(24, 132, 10, 0.6), inset 0px 11px 28px 0px rgb(255, 255, 255);'></div>" Html Control for Box- "<div style ='height:605px;width:680px;background: linear-gradient(

Multilingual PowerApps

Image
There are 2 ways to make your app Multilingual. 1. You can use the Microsoft Translator connector that is already available in PowerApps. The only concern is you need an Azure subscription for this. So just like me a lot of people won't be having Azure subscription. So what can we do? Well actually there is a quite better way to make your app multilingual without using Microsoft translator.  That's where the second approach comes into picture. 2. You can use Power Automate and AI Builder collectively to help you out. If I be honest this is much more convenient approach when you have a quite a decent amount of Text Labels. This is really a user friendly approach and if you stick with me till the end you'll just be fine. Here's a Glimpse of the Multilingual Functionality. Let's Start (Approach 2)- a. Power Automate Flow: 1. We can start by creating a Power Automate Manual Trigger flow with LanguageTag as a parameter. 2. Create an excel file with 3 columns ( TextID, La